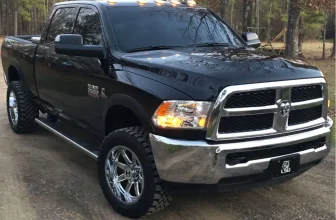
Vehicles with bigger tires installed always draw people’s attention, even if the person is not a car enthusiast. Car owners typically install larger tires for one of two reasons: to improve off-road performance for better passing or to make their vehicle more aggressive and unique for everyday cruising.
Bigger tires require more space in wheel wells, meaning that when you place larger tires, you realize that they rub your fenders. Even slight tire rubbing is not good because you risk damaging both your tires and fenders. The solution here is to cut your fenders to fit bigger tires.
If you want to know more about how to do this, keep reading our article for more detailed information.
Cutting Fender Stages
Before starting the process, it is recommended to remove the wheel with a jack so you won’t damage it while trimming your fender.
Tools needed for the operation:
Impact wrench – powerful tool for quick and effective bolts removal
Ratchet or socket wrench – for better access to complicated areas
Angle grinder – for grinding and cleaning of the surfaces
Flat and Sand disk – for angle grinder
Additional materials:
Newspaper or same – to make your fender trimming blueprint
Pen, pencil or marker – to make all necessary marks
Adhesive tape – to stick fender trimming blueprint
Face protective mask, respirator and gloves – to secure oneself from sharp edges, dirt and dust.
Stage 1: Make a trimming blueprint
A trim blueprint will serve as a sample, helping you to define how you want to cut your fenders. When you make one, you can simply apply it`s pattern to the rest of the fenders while you only have to make the same lines and curves.
You can use a piece of newspaper (or any other material you like) to make a template with markings to see and further obtain a shape you want to have. If the sheet of newspaper does not adhere enough, lightly moisten the fender of the car with a wet cloth, wait 2-3 minutes, and attach your template to the fender again. If this method does not work for you, use several adhesive tapes to hold the template firmly.
Stage 2: Mark the area you are to trim
Use a sheet of the newspaper to wrap it around the fender`s part and tape the side of the sheet that`s facing the fender`s inside. The sheet of newspaper will take on a fender shape, making the cutting process slightly easier.
Taking into account that you`ll be applying this template on both sides, the newspaper`s center has to be adjusted with the door edge in order to keep accuracy.
Stage 3: Cut out your fresh-made fender trimming blueprint
Now you have to cut out the blueprint you made on a newspaper piece. It will be your guide for further cutting processes. It is recommended to leave some additional space on the blueprint pattern, so you could easily make some trimming changes if necessary.
Undoubtedly, if you notice that your fender trimming template takes up much more space when you place it on your fender, you`ll have to make additional cuts to it until you are satisfied with your result.
Stage 4: Take off the fender to trim it
It is important to remove a fender from your vehicle’s body: firstly, it will significantly ease your work, and secondly, you won’t make any undesired cuts to your fender or vehicle`s body.
To safely detach your fenders, check the location of every bolt that holds them. Usually on pickup trucks and other 4x4s, two bolts are placed underneath, others are perpendicular above them, two in a lower part of the front, and one bolt is located just inside the door.
Resort to an impact wrench to remove the bolts. However, if there are complicated areas to reach, use a ratchet or a socket wrench for more precision and effectiveness.
When you remove the fender, lay it on a flat, even surface. Protect yourself from sharp and rough edges and dirt by wearing protective equipment such as a face mask and gloves. Wear a respirator as well to protect yourself from dust.
While cutting fenders, try not to use a reciprocating saw or dremel tool. A reciprocating saw tends to deviate from the main cutting point where its blade just cuts through the entire fender.
A dremel tool is more accurate, but the trimming process will be extremely long.
The best choice to cut the fenders is an angle grinder. It provides stable and precise operation.
Stage 5: Examine the fender`s original placement
With the wheel and fender removed, you can have a better look at where your wheel and fender were mounted. Usually, when your fenders are installed, two metal panels are merged together.
When you hit potholes or bumps, these metal panels absorb the impact and extend up, creating grooves or humps around the fenders. To level off metal panels, you should hammer both of them.
Now take an angle grinder and make a half-inch cut across the fender’s location. Such action will give your springs more space and sleek the coarse edges of your fender.
Stage 6: Place the trimmed fender back
Take your cut fender and place it in its position. Screw your fender back with the help of an impact wrench or a ratchet. Make sure that all the bolts are fastened properly.
Fender Trimming Superstitions
Trimming can significantly distort the fender
When you imagine that you have to cut your vehicle’s body part, you unconsciously feel the fear of accidental damage to its structure and shape. Surely, if you haven’t done anything like this before there are some moments you have to take into consideration before doing the job.
However, if you have faced trimming works before, it becomes much easier for you to fix previous mistakes. The rule of thumb while trimming the fender is patience and sequence of actions.
Trimming boosts rust appearance
It is believed that the risk of rusting is much higher than if your factory fenders were left stock because the metal section would be exposed to the influences of oil, dirt, and air. It may sound amazing, but even uncut fenders may rust due to dirt and humidity inside of them.
It is acceptable to leave a small gap between the tires and the fenders’ lower sections
It is advisable to leave a gap big enough due two reasons.
- First, when you corner, your vehicle’s body changes the center according to the side you turn. As a result this side is more subjected to rubbing the fenders with tires.
- Second, with low space, the wheel will hit the fender when you get an obstacle or pothole because car suspension will react to it.
To Sum Everything Up
Fender trimming process may look relatively simple at first sight, however when it comes to practice one realizes that it needs effort and patience to obtain desired result.
While trimming your fenders do not forget about safety measures and have all the necessary tools with you. If needed, check your trimming blueprint several times to be sure that the measurements satisfy you.
If you are not sure that you handle fender trimming, ask a specialist who has done trimming car bodies before. Of course, it may cost you a certain sum, but you`ll be confident that fender modification will be done as it should.


